From the logistics module, you receive the products that have arrived. You know what you physically have on the premises and you check if the products have already been shot or not.
From the homepage of the Grand Shooting app, click on the Logistics link.

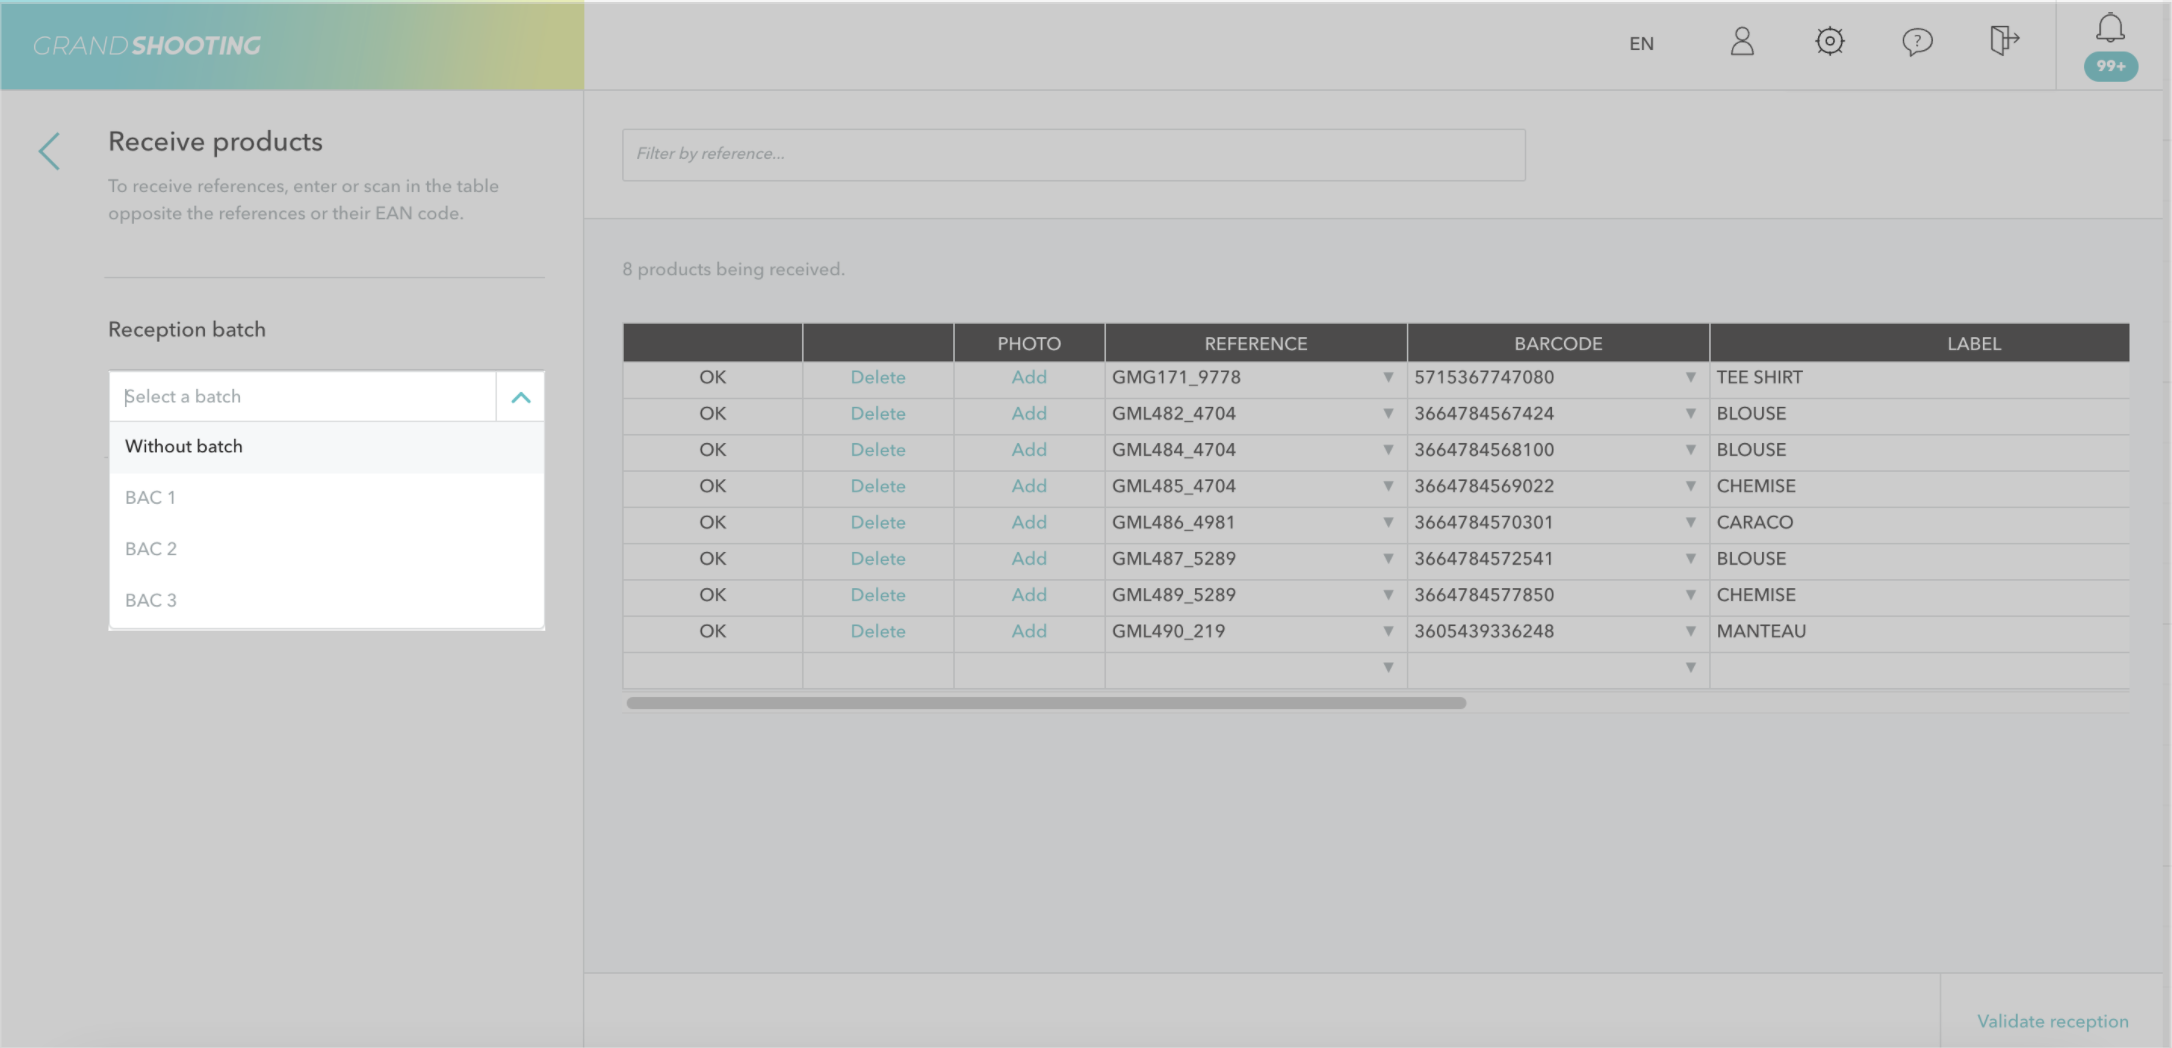
Then click on Receive

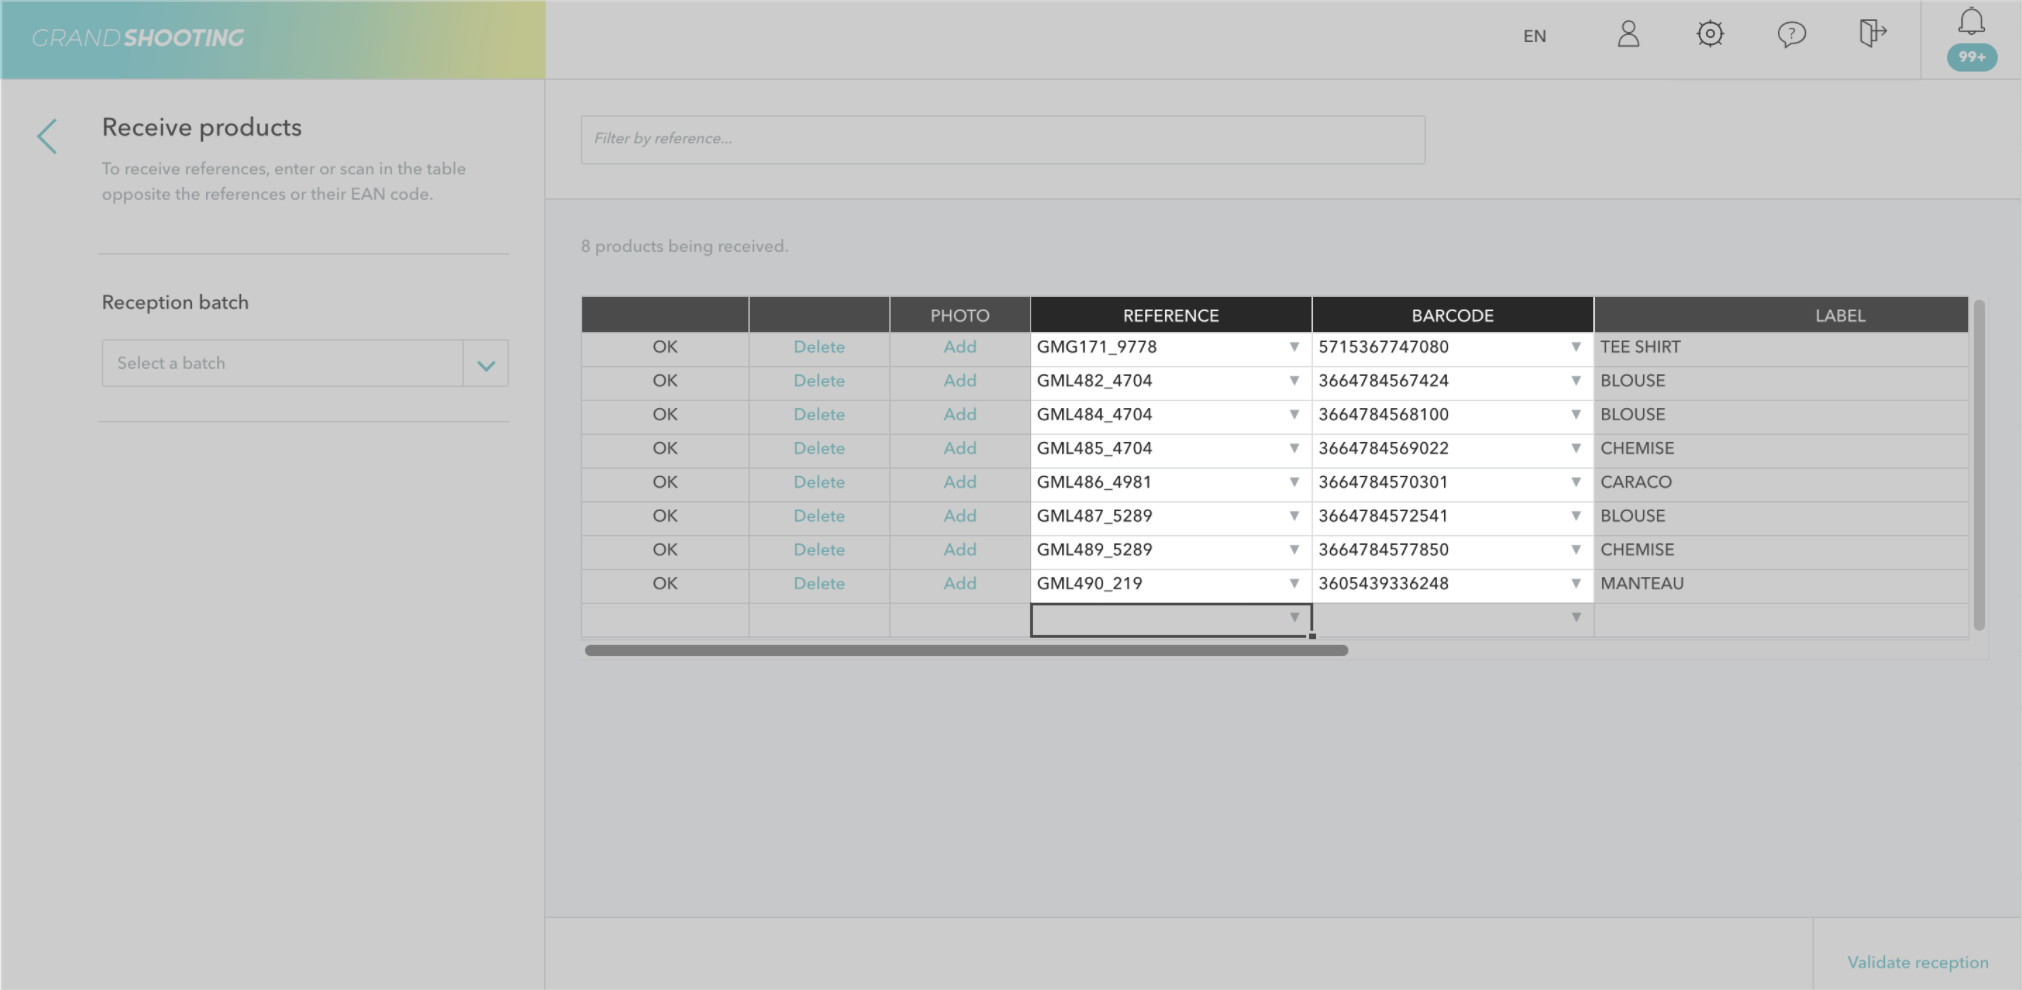
If your products are labeled, point your cursor in the first cell of the Barcode column, then scan the items one by one. As you do so, Grand Shooting links with the catalog to display the Reference information.
If the products are not labeled with barcodes, then the reception can be done manually from the Reference column.
When you scan a Reference, 3 scenarios can occur:
As long as you have not clicked on the Validate receipt button at the bottom right of the screen, the receipts are not taken into account. In case of an error in the table, you can click on the Delete link of the concerned line.
Note that the table allows you to enter comments on the products, for example when they have defects: you can also take a photo if your computer has a webcam.
Once the receipt is validated, the received products appear in No shelf. You can also find them along with all other items via the View all items link.

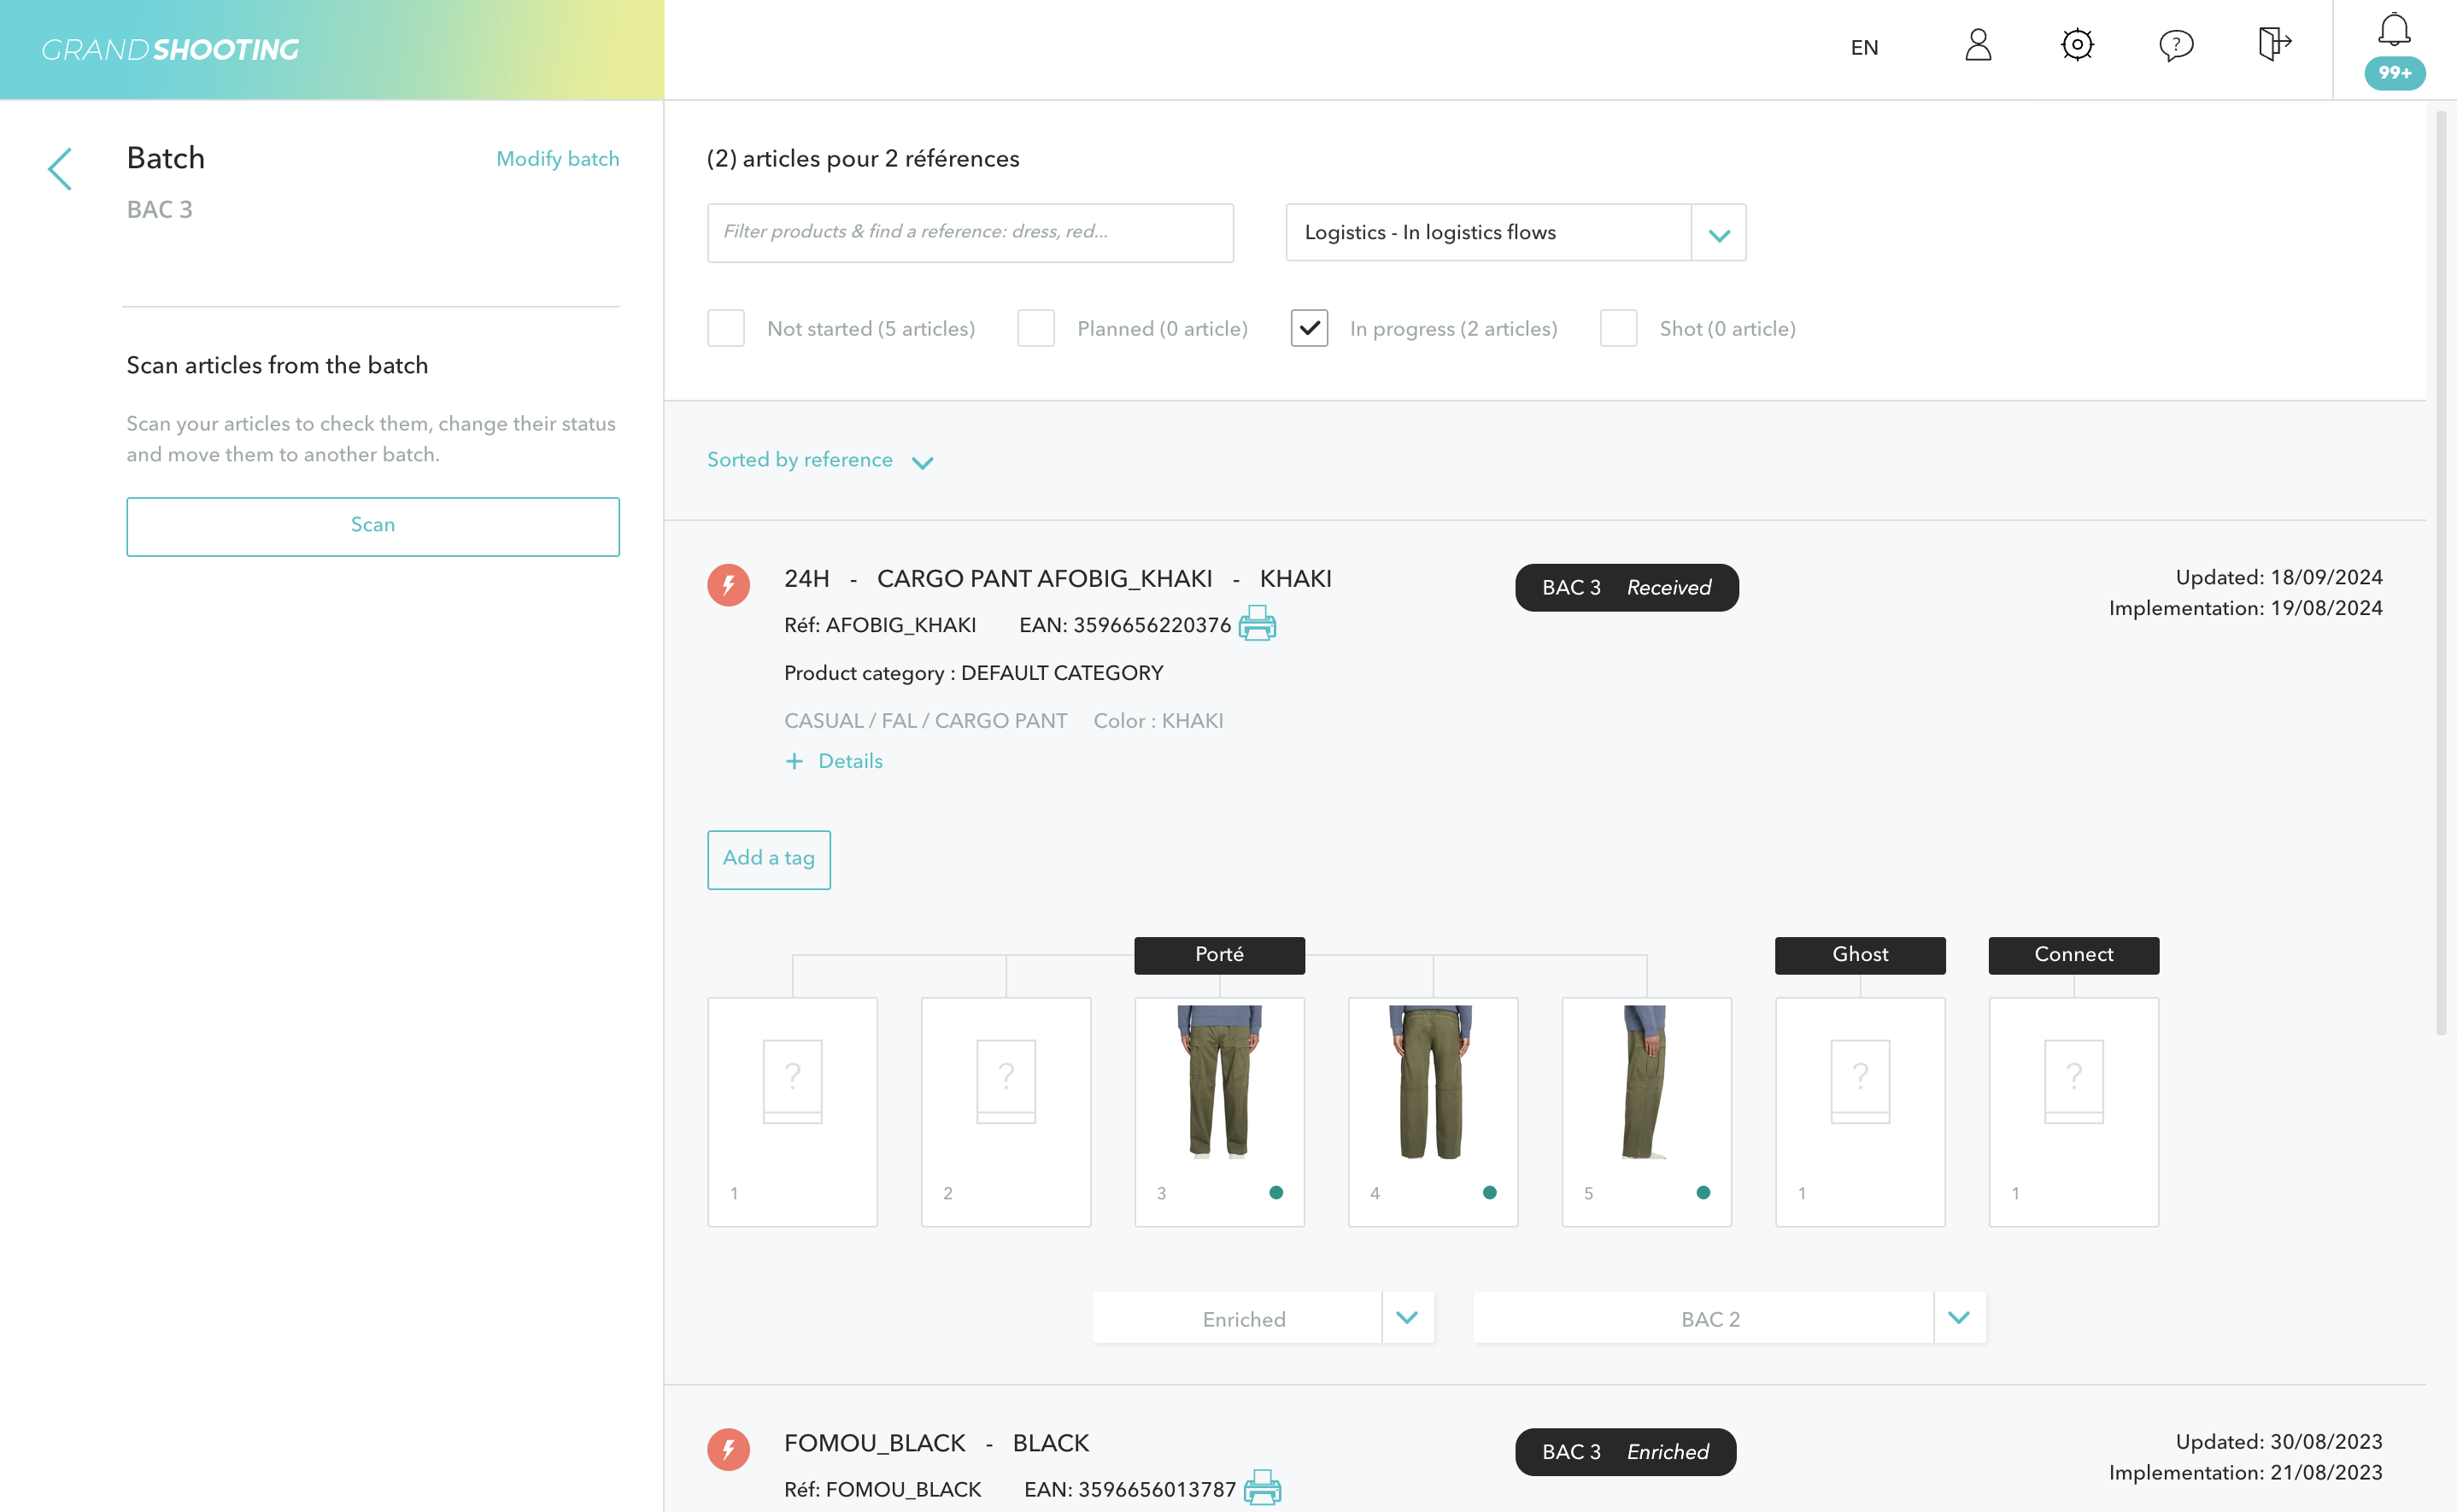
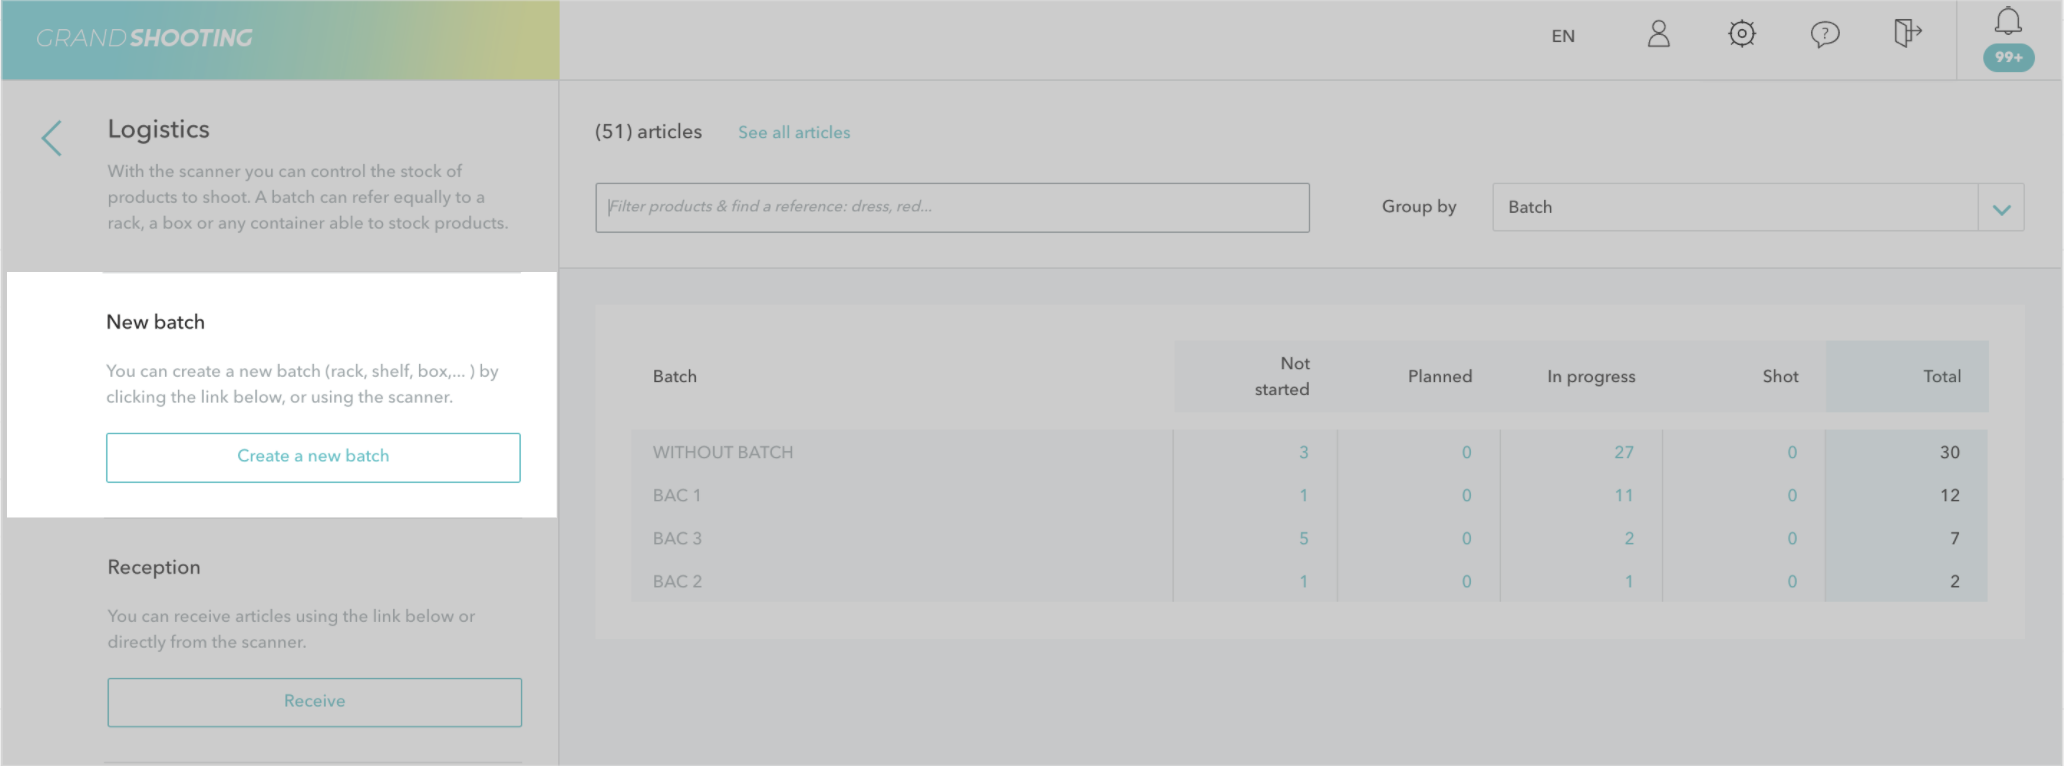
The counters display the number of products in each shelf as well as their progress in the image workflow (Not started, Scheduled, In progress, Shot).
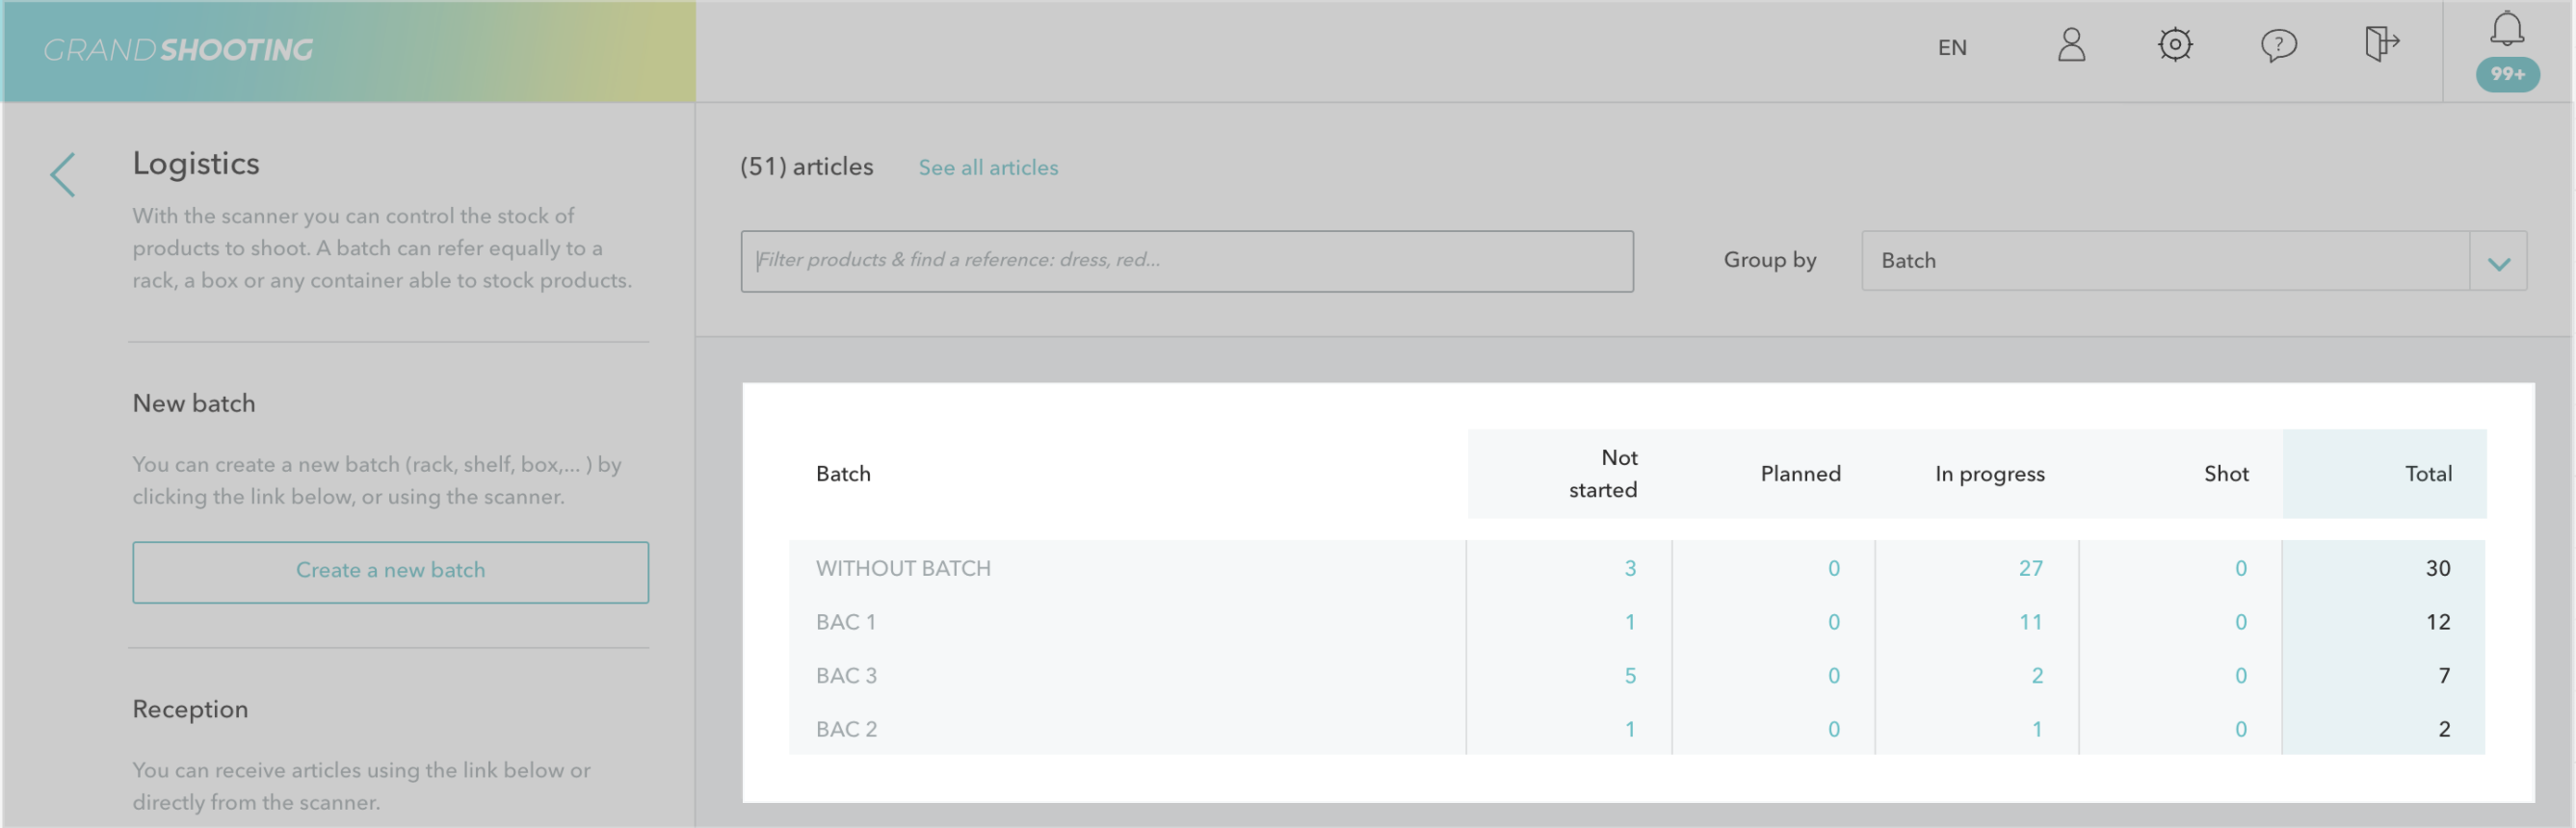
By clicking on one of the counters, you see the content of the shelf with the products it contains.
You find the overall progress state.
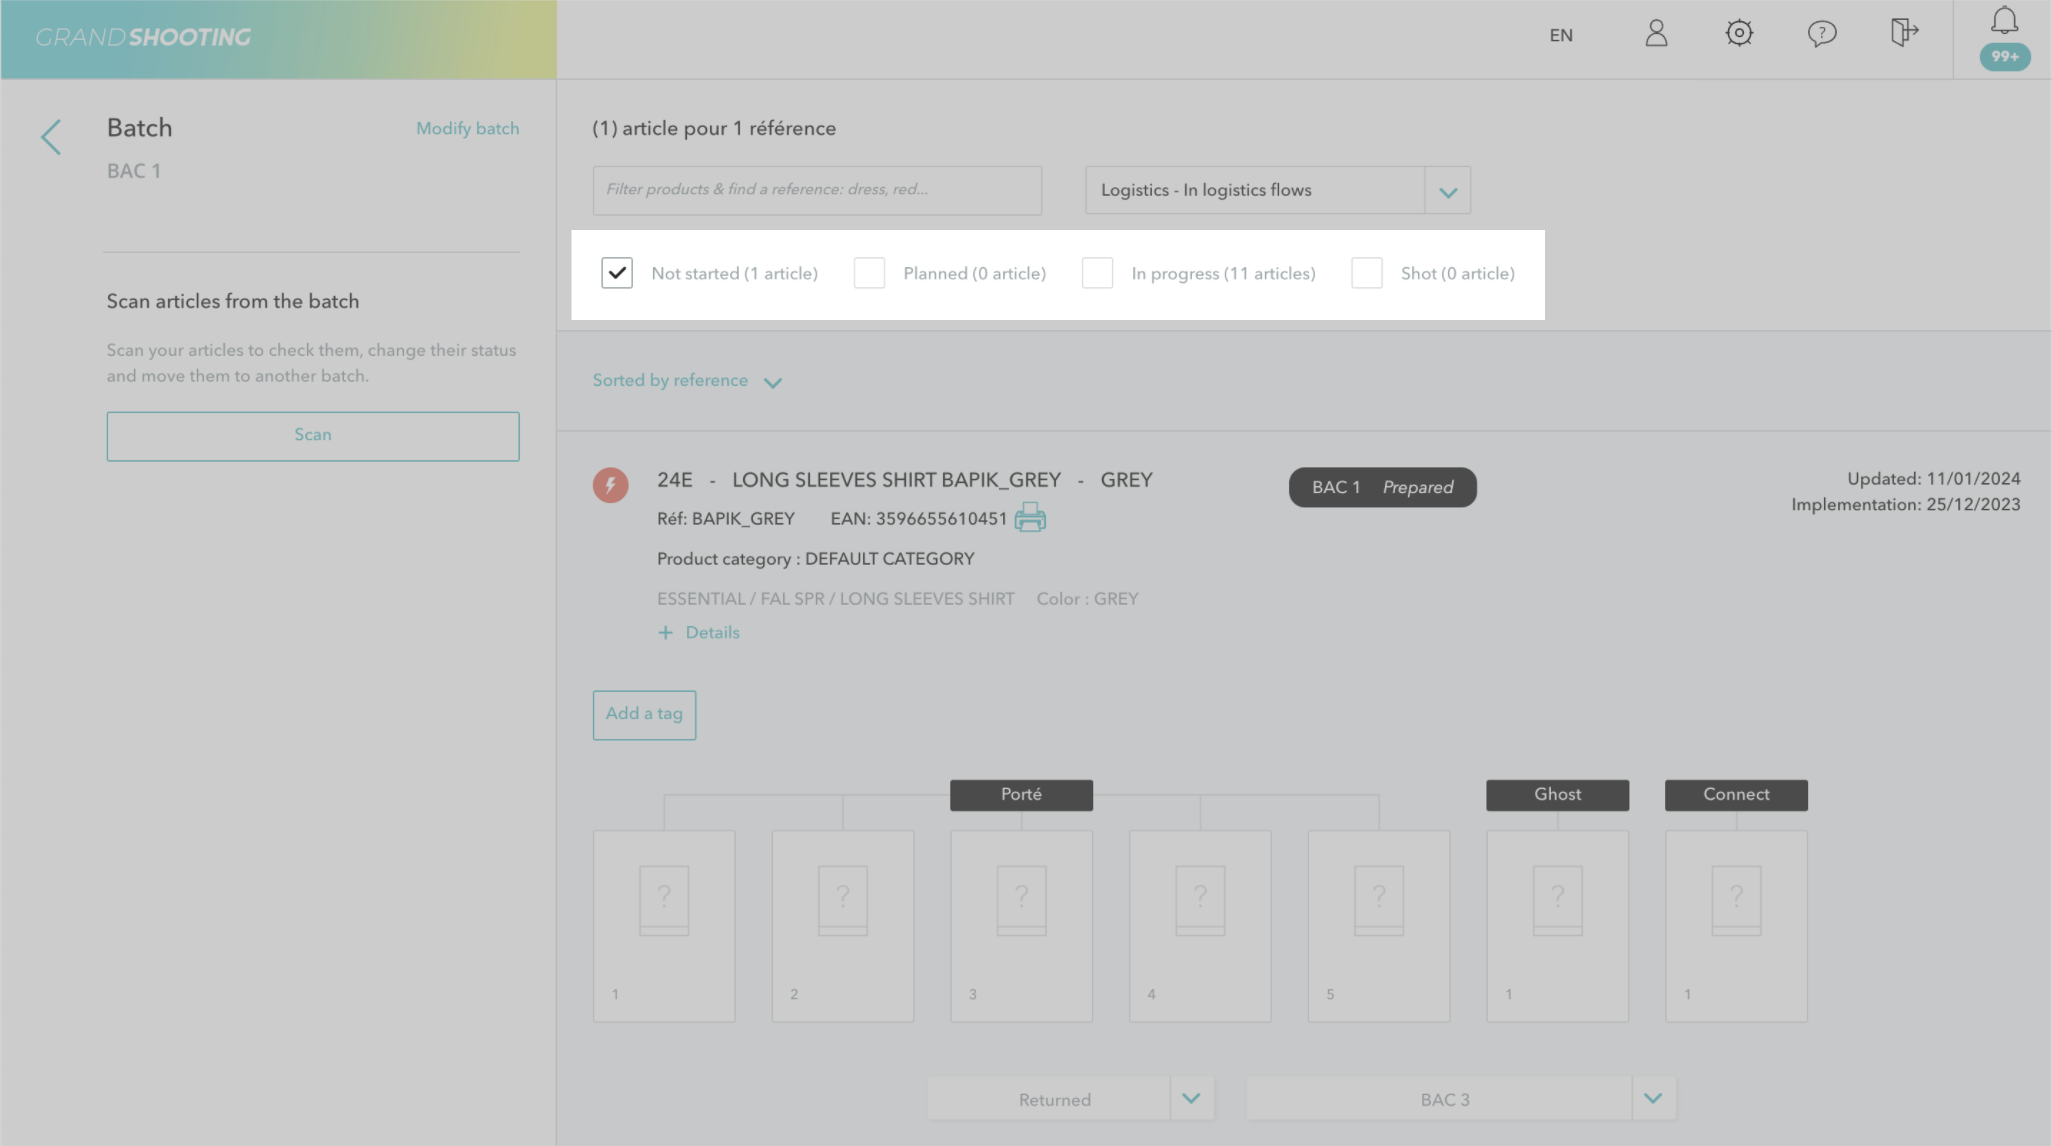
The presentation of product References is similar to the presentation within the catalog (catalog information, views to be produced, etc...). If media are available, then they appear and the counters are updated according to the workflow statuses.
Grand Shooting allows managing a real sample stock, with different shelves (a shelf can be a box, a rack, a shelf, etc.). You can create as many shelves as you wish.
Products can be received in a shelf and moved from one shelf to another as they progress through the logistics workflow.
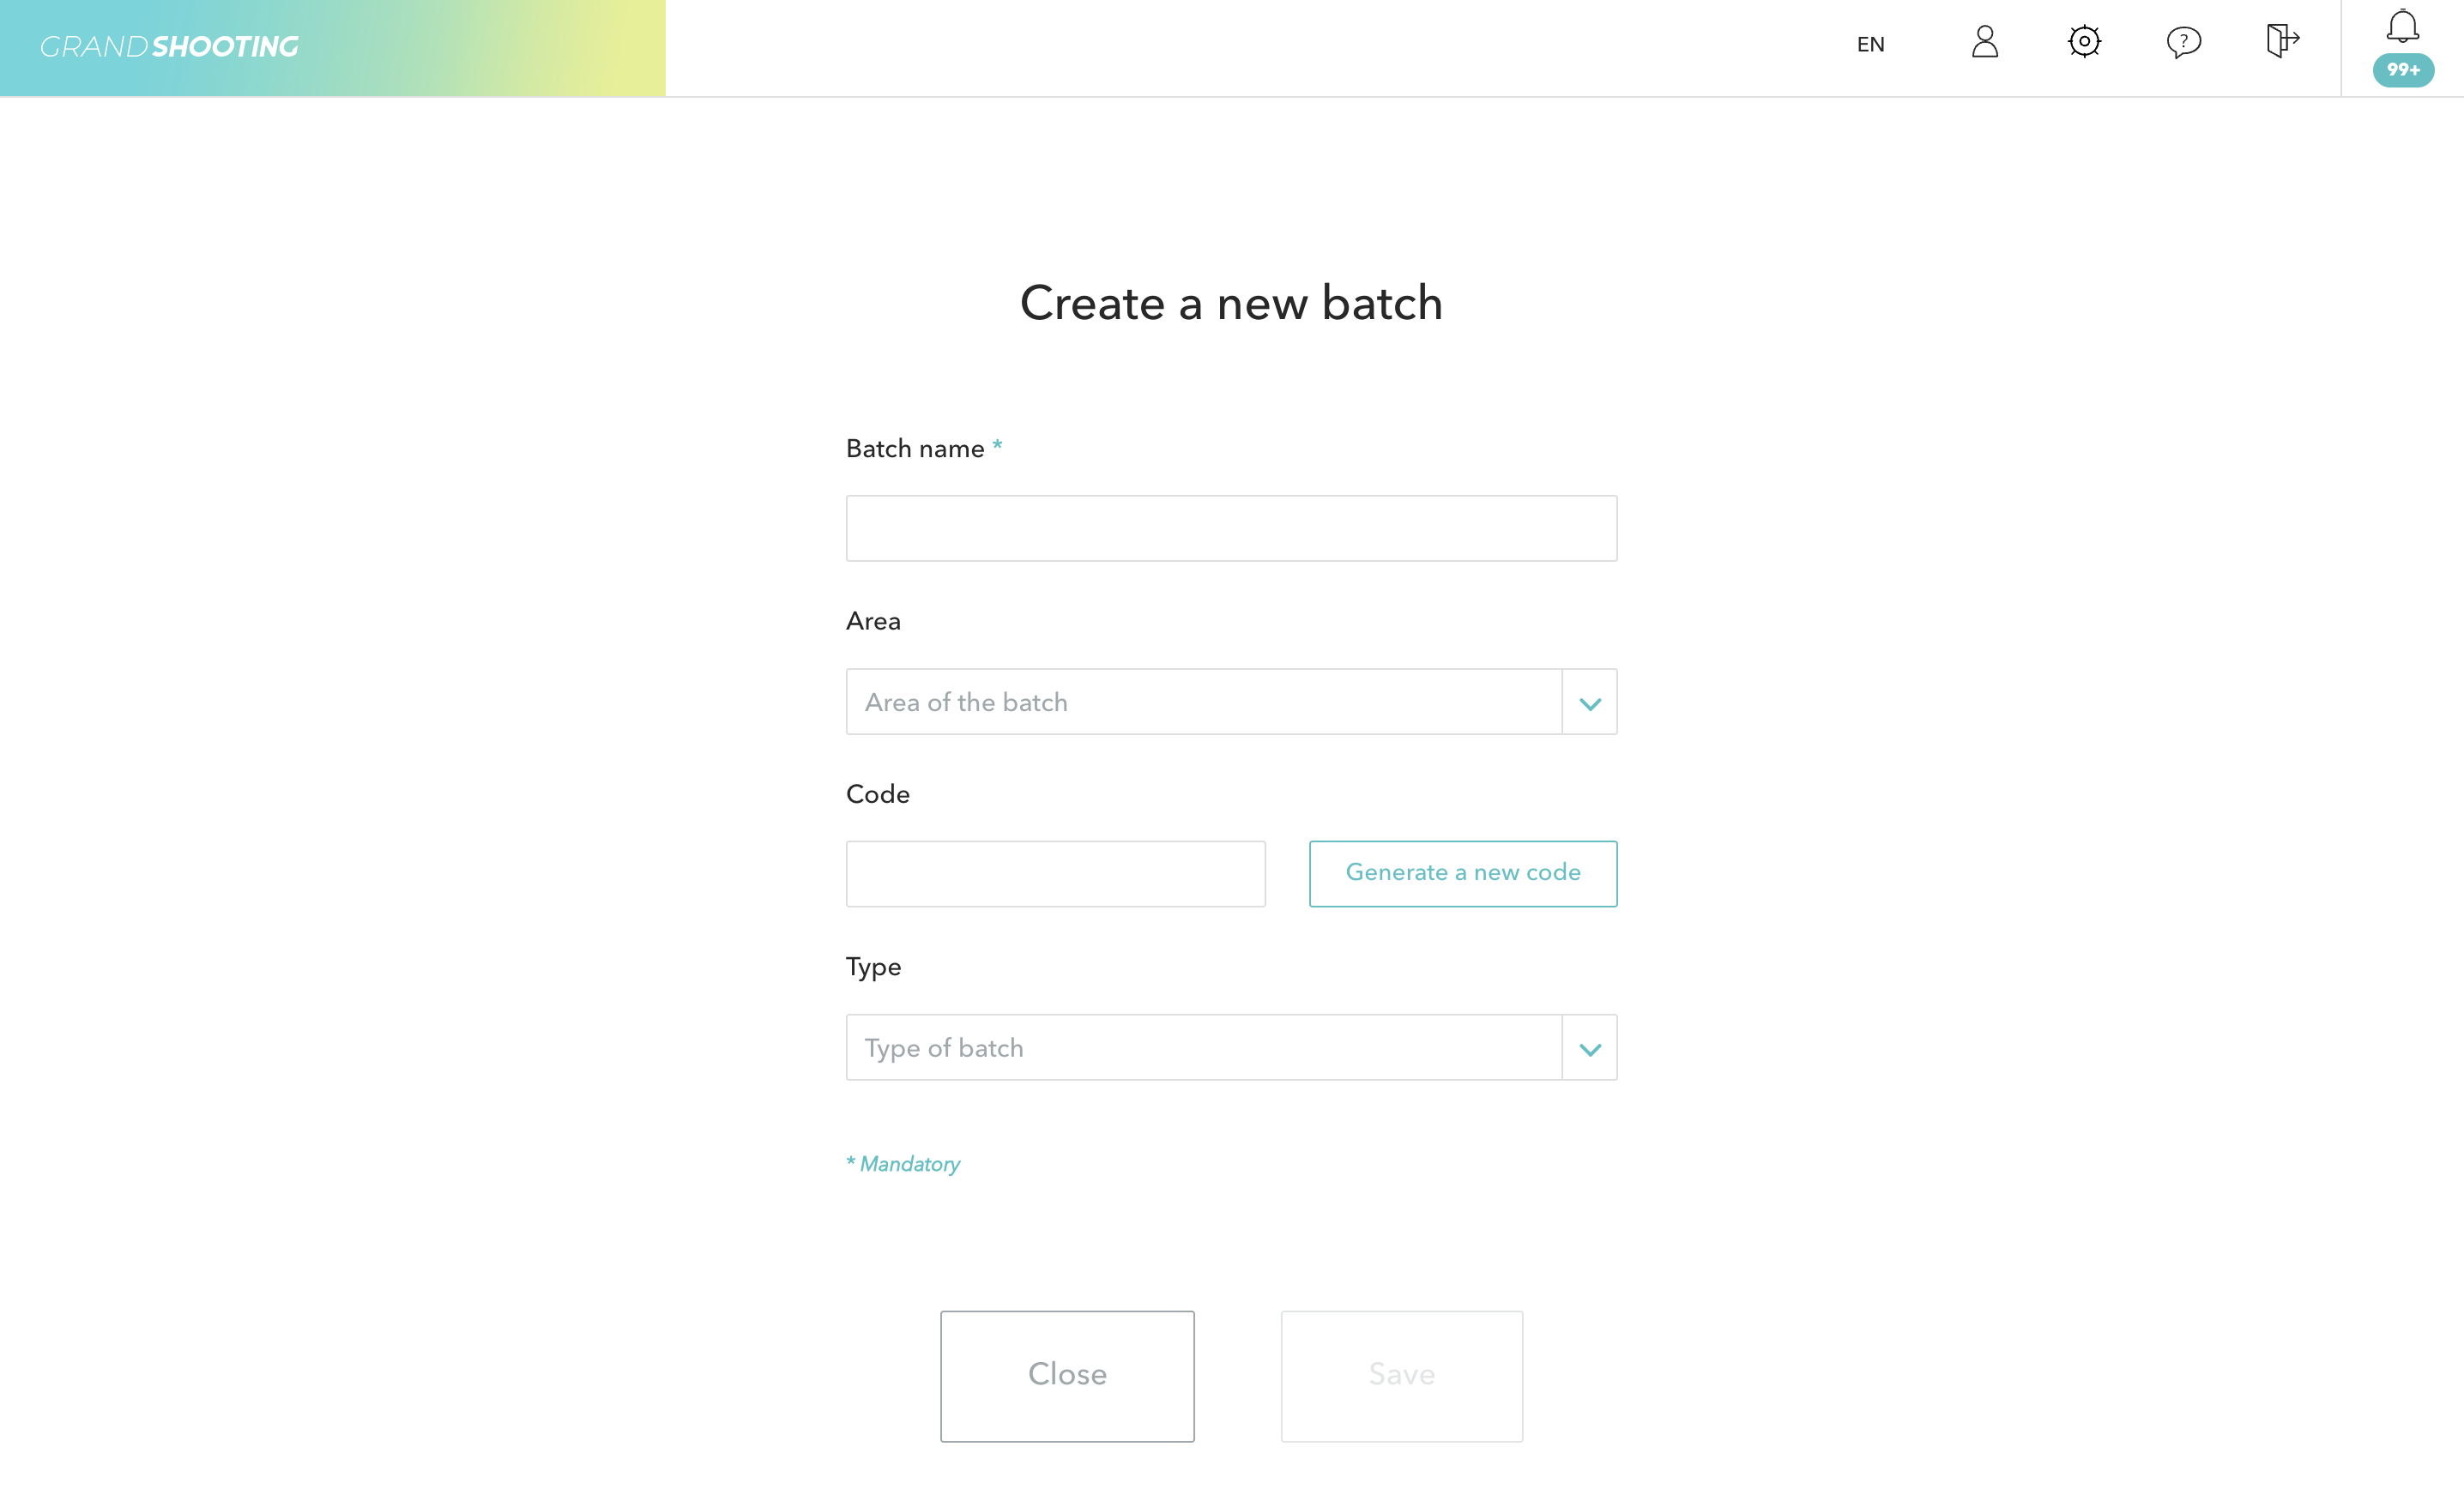
To create a shelf, click on Create a new shelf.
Then enter the information:
Once saved, the list of shelves is available. The counters display the number of products in each shelf as well as their progress in the image workflow (Not started, Scheduled, In progress, Shot).
To receive in a shelf, click on the Receive button and use the Reception Shelf dropdown menu. The received products will automatically be added to the indicated shelf. They are automatically set to the Stored status as soon as they are received directly in a shelf.